Translations by gtranslate.io
Sidebar
manual:user_guide:tracks:planning
This is an old revision of the document!
Table of Contents

Route Planning and Editing
About
Routes are strings of waypoints along which user is guided or navigated.
Unlike tracks, routes are pre-planned and put into navigation devices or drawn on maps so that we can travel along their paths. Tracks that were directly recorded or imported from someone else who recorded them can be turned into routes.
Routes can be drawn manually on the map or calculated by a navigation device, by PC software, web application or mobile application. Locus Map provides several methods of creating routes - drawing point by point, drawing with routing service assistance or rendering from tracks.
Route Planning Screen
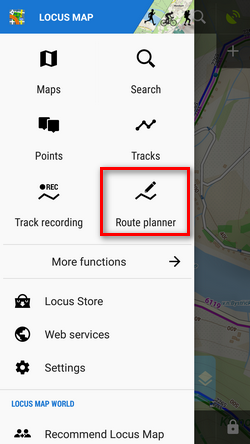
- Menu > More functions > Add new route & Measure
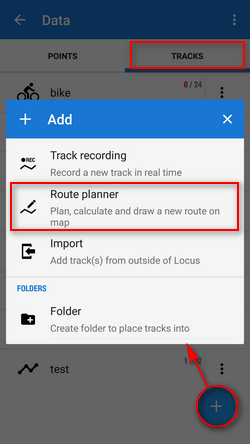
- Tracks >
 > Add new route & Measure
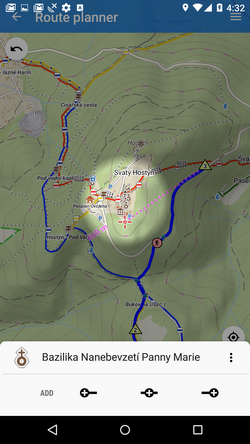
Route planning screen consists of the main map screen, additional bottom panel and total distance counter:

- Total distance counter - displays real total distance of the route. Tapping it changes distance units.
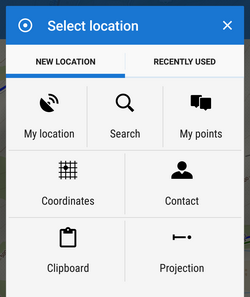
 adds a routepoint on the map screen cursor position. Tap-and-hold launches the Location selector for further methods of selecting waypoint location.
 removes the last added routepoint
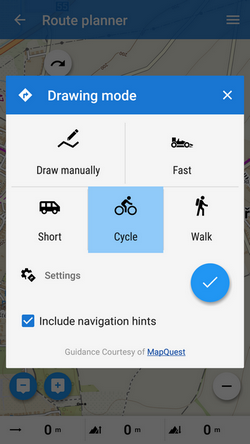
 displays dialog of the router assisted drawing:
 routing settings - sets routing data source and many others useful options


 … selection of routing profiles - depends on used routing service
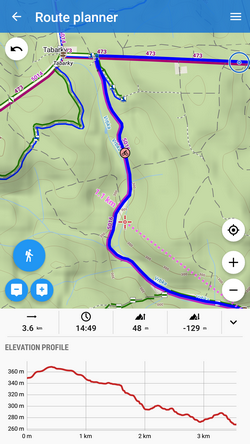
 compute instructions - renders also voice navigation commands
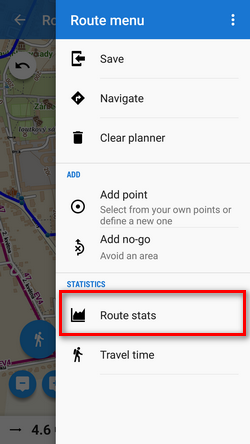
 tool menu:
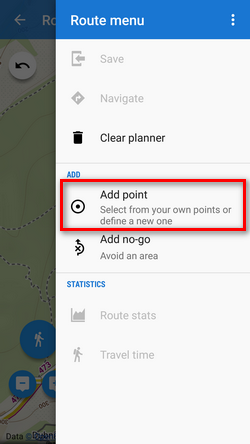
- Quick add - enables adding routepoints by simple tapping the map - inaccurate but very fast
- Compute area - adds another digit field with computed area defined by routepoints (not the computed route itself). Tapping the digit changes its units: m2 > ha > km2 > ft2 > yd2 > acre > mi2 > nm2
- Define width - displays a slider adjusting width of the clicked line (not the route) from 0 to 99 px.
- Show chart - displays chart tab of the route detail with route elevation profile. Useful for planning in unknown terrain.
- Travel time - here you can select an activity on the route and get estimated time spent on the trip
 finishes route planning and proceeds to saving (or guiding along the route)
 finishes route planning and deletes the route (after security prompt)
Drawing instructions
- make necessary settings - e.g. select routing service
- Menu > Settings > Navigation
- or routing data service dialog > navigation settings
- set starting point:
- shift
 map screen center at the desired spot - quite accurate method
 - select location by the location selector - depending on selected method the starting point location can be defined very precisely, e.g. by coordinates or postal address
- quick add - tapping the map - fastest method but not accurate
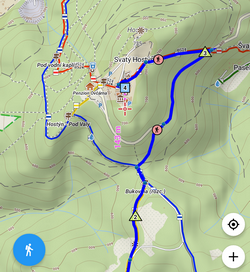
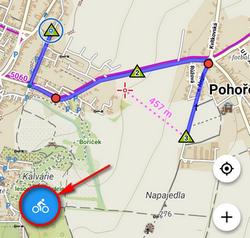
- add route points - use any of above mentioned methods to add routepoints. They are displayed as green dots on the line. Red dots between them can be drag-dropped to further shape the line and to insert more routepoints.
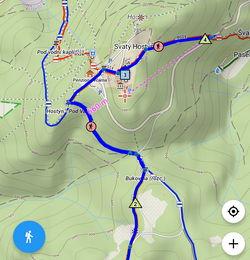
- router assistance - makes route planning much easier. Turn it on, add routepoints and the router will compute the route between them along existing roads and paths. Where the routing data source does not provide reasonable route, turn it off and continue by manual clicking until the routing source allows computing again. It is also possible to change the routing profile during routing to adjust the computing result according to your needs. Always turn the routing assistance function first before you want to compute route between two new routepoints, not vice versa!
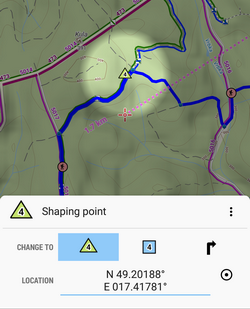
- by tapping a green routepoint you can create a via point (the green changes to blue) - a point you will be navigated to even if the route is recalculated during navigation.
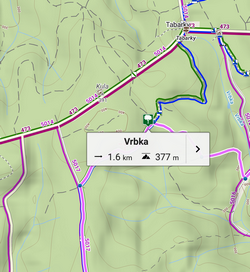
- the viapoint can be renamed
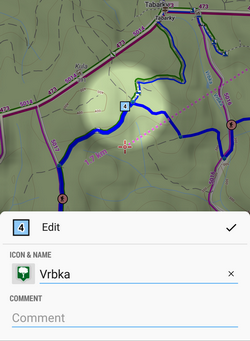
and after saving the route it will be marked by an icon:
Voice navigation with TTS on will notify of such a via point. - you can also add points of interest as via points. Click them on the map and tap on the popup.
They will be marked blue immediately.
- remove waypoints - in case you do not like the route, you can go back by removing points and then repair the route by adding new ones. Or by tap-and-hold you can delete whole route.
- save the route
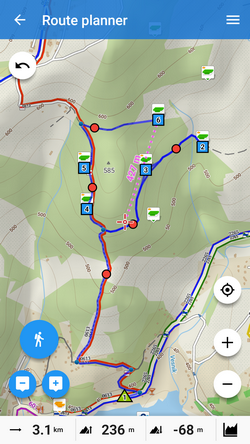
Enter (1) name and description, select (2) activity on the route, select destination (3) folder (or create a new one), and set (4) route line style - color, width etc. if needed. For quick guiding without saving the route tap Guide ON in topbar menu.
Offline planning a route with BRouter
If you need an offline routing engine for planning routes (and point-to-point navigation as well), download and install free co-application BRouter. Download also offline routing data of the area you are planning the route through and set BRouter as default router in navigation settings.
BRouter provides also alternative method of planning your route >> in cooperation with Locus Map. It utilizes BRouter's ability to engage transit via points and nogo points that, on the contrary, must be avoided during navigation.
Rendering routes from tracks
 Tracks can be turned into routes when they are intended for navigation or guidance:
- select track in data manager or tap on it on the map
- select Navigate or Guide On or Guide On reverse
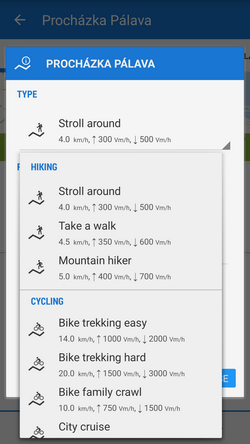
Estimated travel time
When you plan a trip it is always useful to have some estimation of the trip travel time. Locus can calculate this time after selecting the trip activity - 3 types of walk, 9 types of bike and two of crosscountry skiing. The time is calculated from the distance, estimated speed and elevation gain per hour. 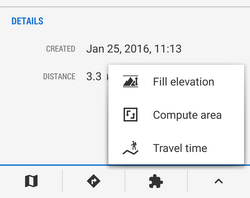

This function can be found in the track detail screen menu > more.
Editing already saved tracks and routes
If you want to edit saved tracks (e.g. due to inaccuracy of the GPS recording) or already planned route, you can do so directly on map:
- select a track/route to edit - in the data manager or on the map
- select
 Edit on map from the
  More options menu
 - a new bottom panel emerges:
 turns back to the track detail screen
 displays the nearest trackpoint detail
- displays trackpoint editing menu:

- Display on chart - displays selected trackpoint on chart
- Insert/edit trackpoint - highlights the selected trackpoint and its surrounding trackpoints. They can be dragged and extra trackpoints can be added by tapping the connecting lines.
Each single edit action must be individually saved by
OK button before proceeding on some other place
- Convert to navigation waypoint - offers selection of navigation commands to associate to the point and converts it into a navigation waypoint

TIP: when two coincident trackpoints covering each other occur and you want to add navigation command to the other that is not displayed, tap the point twice to switch between them.
- Delete trackpoint - removes selected trackpoint
- Cut part of track - selects a part of track to cut out (useful when you forget to pause track recording when having a break during a trip or training etc.)
- Remove all before - deletes all trackpoints from the start of the track to the selected trackpoint
- Remove all after - deletes all trackpoints from the selected trackpoint to the end of the track
- Split - splits the track into two in the selected trackpoint
 moves to previous trackpoint, long-tap moves to the start of the track
 moves to the next trackpoint, long tap moves to the end of the track
- aborts editing
manual/user_guide/tracks/planning.1478180945.txt.gz · Last modified: 2016/11/03 13:49 (external edit)
Except where otherwise noted, content on this wiki is licensed under the following license: CC Attribution-Share Alike 4.0 International
