Translations by gtranslate.io
Sidebar
manual:user_guide:functions:data_import
This is an old revision of the document!
Table of Contents

Import
About
Import is used when you want to work with tracks and/or points from outside of Locus - websites, apps, add-ons, etc.
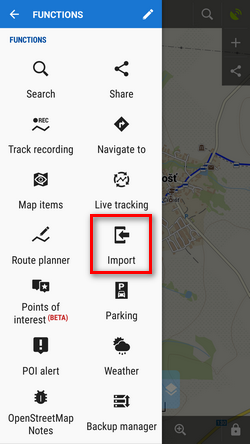
1. Launch import
- Menu > (more functions) > Import
2. Select a file
A file manager opens with tabs displaying available drives - local, Dropbox (if installed), Google Drive (if installed) and a field to fill in a URL of a remote file. Importable files are in full color and are clickable:
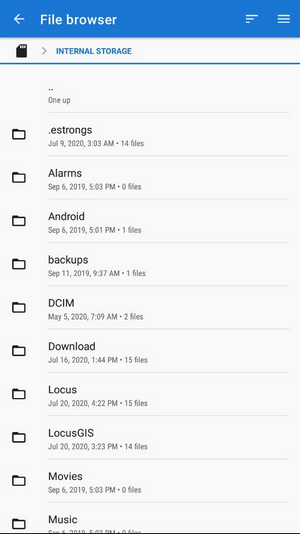
- Local - directories in your device memory (both internal and external).
- Dropbox - contents of your Dropbox. Dropbox login is required when using the tab for the first time.
- Google Drive - contents of your Google Drive. Google Drive login is required when using the tab for the first time.
- Remote file - a field for inserting a URL of a remote file stored on the internet
3. Set parameters and import
After selecting the file Locus Map analyses it and modifies the import dialog according to the content - the dialog can process points or tracks or both of them at once:
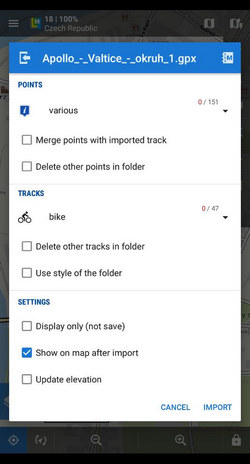
Points
- Folder selector - selects the folder into which the points will be imported. It is possible to create a new folder directly from the menu.
- Merge points with imported track - adds the points to the track as waypoints (points are not imported to a separate folder)
- Delete other points in folder - removes all other points from the selected folder before the import
Tracks
- Folder selector - selects the folder into which the file will be imported. It is possible to create a new folder directly from the menu.
- Delete other tracks in folder - removes all other tracks from the selected folder before the import
- Use style of the folder - imported track will take color, thickness, pattern etc. defined for the folder it is imported to
Settings
- Display only (not save) - tracks are just displayed on the map screen - useful for a quick preview of the imported file
- Show on the map after import - displays imported tracks on the map when the import is finished
- Update elevation - adds or updates the value of imported tracks' elevation (both only if the offline elevation data is available)
- Cancel - aborts the action
- Import - confirms the action
After pushing the Import button the imported points appear in the selected folder of the Points manager, respectively tracks in the Tracks manager. Depending on whether the option Display on the map after import is checked the imported data appear on the map as well.
manual/user_guide/functions/data_import.1569946600.txt.gz · Last modified: 2019/10/01 18:16 by mstupka
Except where otherwise noted, content on this wiki is licensed under the following license: CC Attribution-Share Alike 4.0 International
